
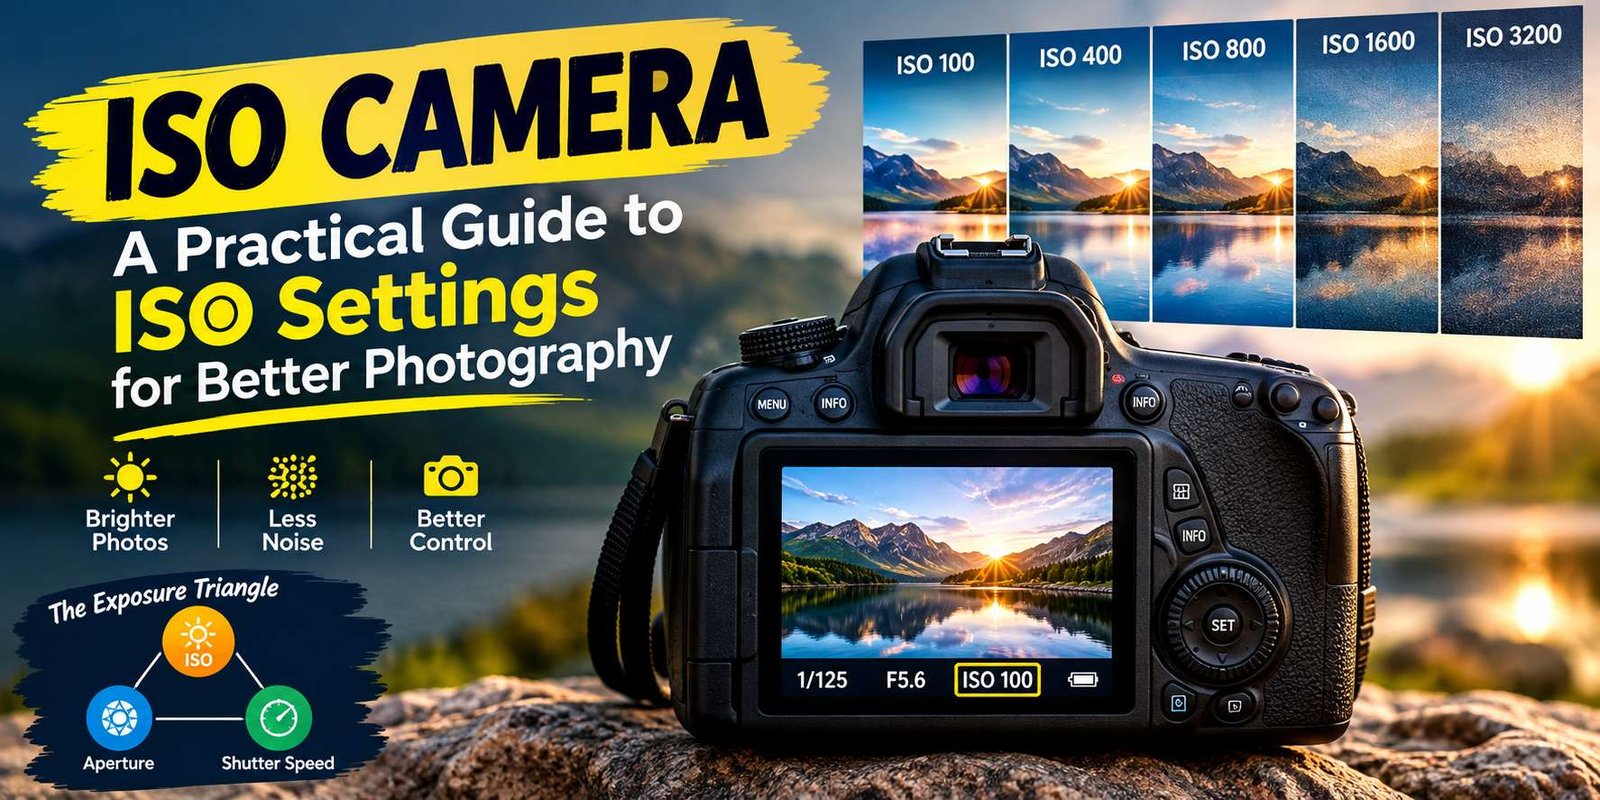
ISO Camera: Understanding ISO Settings for Better Photography
A camera can be surrounded by beautiful scenery and still produce a disappointing photograph if its exposure settings are not balanced. One of the controls that can make a major difference is ISO.
If you have recently started using a DSLR, mirrorless camera, or advanced digital camera, you may have seen ISO values such as 100, 200, 400, 800, 1600, and beyond. These numbers can look complicated at first, but the basic idea is easier to understand once you connect ISO with the amount of light available and the type of photograph you want.
ISO becomes particularly useful when you are dealing with changing light. A sunny outdoor scene and a dim indoor room obviously do not give your camera the same working conditions. Instead of treating ISO as a fixed setting, think of it as one of the tools available for balancing an exposure.
This guide explains ISO camera settings from a practical perspective, including what the numbers mean, when to raise or lower ISO, how ISO affects image quality, and how to choose a sensible setting for different photography situations.
ISO Camera Meaning in Simple Words
ISO is a camera exposure setting represented by a number.
On a digital camera, changing the ISO setting changes how the camera handles the light recorded by its imaging system. Lower ISO values are generally used when plenty of light is available. Higher values can be useful when the scene does not provide enough light for the shutter speed or aperture you need.
A camera might offer settings such as:
- ISO 100
- ISO 200
- ISO 400
- ISO 800
- ISO 1600
- ISO 3200
- ISO 6400
- ISO 12800
- ISO 25600 or more
The exact range varies between camera models.
ISO is also one of the three major exposure controls, alongside aperture and shutter speed.
Why Is ISO Important?
Suppose you are photographing a child running inside a house.
The room is not particularly bright, but you want to keep the shutter speed fast enough to capture movement clearly. If you use a very low ISO, you may have to slow the shutter considerably to get enough exposure.
That could create motion blur.
Increasing ISO gives you another way to balance the exposure while keeping the shutter speed where you need it.
This is why ISO is not simply a “brightness setting.” It is part of a larger decision involving the subject, lighting, shutter speed, aperture, and desired image quality.
Understanding the ISO Number
The numbers themselves are easier to understand when you compare them.
Lower ISO
A setting such as ISO 100 is generally useful when the scene is already bright.
Examples include:
- Sunny outdoor photography
- Architecture during daylight
- Landscapes
- Product photography with strong lighting
- Still subjects on a tripod
Lower settings are often preferred when possible because they can help produce cleaner-looking photographs.
Higher ISO
A setting such as ISO 1600 or ISO 3200 can become useful when the available light is limited.
You might need it for:
- Indoor events
- Evening photography
- Concerts
- Indoor sports
- Wildlife near dusk
- Handheld night scenes
As ISO rises, visible noise can become more noticeable. Modern cameras have improved substantially at handling higher ISO levels, but the effect still varies from one camera to another.
ISO and the Three Exposure Controls
Understanding ISO becomes much easier when you see how it interacts with the other two major exposure settings.
Aperture
Aperture controls the opening of the lens.
It influences both the amount of light entering the camera and the depth of field.
A wide aperture can help in low light and can also create stronger background separation.
Shutter Speed
Shutter speed determines how long the camera records the exposure.
A faster shutter can help freeze movement.
A slower shutter can be useful for stationary subjects but may introduce blur when the camera or subject moves.
ISO
ISO provides another way to balance the exposure when aperture and shutter speed have already been chosen.
The three settings work together rather than independently.
When Should You Use a Low ISO?
A low ISO makes sense when you have enough light to achieve the shutter speed and aperture you want.
For example, imagine photographing a mountain landscape in bright afternoon sunlight.
There may be no reason to increase ISO substantially. Starting with a low value gives you plenty of room to work with the other exposure controls.
A low ISO can also be useful when image cleanliness is particularly important.
Situations That Often Suit Low ISO
- Bright daylight
- Studio photography with strong lighting
- Tripod-based landscapes
- Product photography
- Architecture
- Still-life photography
However, “low ISO” does not automatically mean “best ISO.” The subject and creative goal still matter.
When Does a Higher ISO Make Sense?
Higher ISO becomes useful when there is not enough light for the other settings you need.
For instance, imagine photographing a basketball game in an indoor gym.
You may need a fast shutter speed to capture players without excessive movement blur. If the lighting is limited, increasing ISO can help you maintain that faster shutter.
The same idea applies to wildlife photography.
A bird flying across the frame may require a fast shutter speed even when the sun is beginning to set. In that case, raising ISO can be a practical choice.
Nikon also notes that sports and wildlife situations can require higher ISO because faster shutter speeds reduce the amount of light reaching the sensor.
Does High ISO Reduce Photo Quality?
It can.
One of the most common effects associated with higher ISO is increased digital noise.
Noise can look like:
- Tiny grain-like patterns
- Colored specks
- Rough shadows
- Reduced fine detail
The amount varies depending on the camera and the shooting conditions.
Modern digital cameras can handle high ISO considerably better than older models, so a high ISO photograph from one camera may look very different from one produced by another.
There is another important point:
Noise is not always worse than blur.
If increasing ISO allows you to capture a sharp photograph of a moving subject, that may be a better result than using a low ISO and ending up with a blurred image.
ISO 100: A Useful Starting Point
ISO 100 is commonly associated with bright conditions.
You might begin with this setting when photographing:
- Outdoor landscapes
- Buildings
- Cars in daylight
- Products
- Flowers
- Outdoor portraits
Some cameras have a base ISO lower than 100, while others use 100 as their base value. The actual base setting depends on the camera model.
Therefore, check your camera specifications rather than assuming every model behaves identically.
ISO 200 and ISO 400
ISO 200 and ISO 400 provide additional flexibility when lighting is not quite as strong.
They can be useful for:
- Cloudy weather
- Shaded outdoor areas
- Indoor spaces with windows
- Street photography
- Family photographs
- Travel photography
These settings are also useful when you need a slightly faster shutter speed than the available light would permit at a lower ISO.
ISO 800 and Above
Once you move toward ISO 800, 1600, 3200, or beyond, you are entering settings that are often useful for darker environments.
Possible applications include:
Indoor Events
People move around, so a slow shutter can easily create blur.
Concerts
Lighting can be unpredictable, and you may need a combination of a fast shutter and wider aperture.
Evening Street Photography
Available light can drop quickly after sunset.
Indoor Sports
Fast movement and limited artificial lighting can require higher ISO.
Wildlife at Dusk
Animals do not wait for perfect lighting, so photographers often have to work with whatever light is available.
The correct setting depends on the camera, lens, lighting, and required shutter speed.
ISO for Portrait Photography
Portraits do not have one universal ISO setting.
The environment determines the starting point.
Bright Outdoor Portrait
If your subject is standing in strong daylight, a low ISO may be perfectly adequate.
You can then choose the aperture based on the amount of background blur you want.
Indoor Portrait
A darker room may require a higher ISO.
If your subject is moving naturally, raising ISO can allow you to maintain a shutter speed that keeps the face sharp.
Studio Portrait
Powerful studio lights may allow photographers to work at a relatively low ISO because there is plenty of controlled illumination.
The lesson is simple: choose ISO based on the actual lighting rather than copying a number from someone else’s camera settings.
ISO for Landscape Photography
Landscape scenes are often ideal for experimenting with lower ISO.
If the camera is mounted on a tripod and the scenery is stationary, you have more freedom to use a longer shutter speed.
That can reduce the need to push ISO upward.
However, landscapes at sunrise and sunset are different.
As the sky darkens, you may have to decide whether to:
- Increase ISO
- Use a slower shutter
- Open the aperture
- Add a tripod
- Combine several adjustments
For long-exposure work, keeping ISO low is often useful when the camera is stable and the subject does not require a fast shutter.
ISO for Sports Photography
Sports photographers usually have one major problem: movement.
A slow shutter speed can turn a fast action scene into a blurry photograph.
That is why ISO becomes an important tool.
Imagine a football player running toward the goal in a poorly lit stadium. You may choose a fast shutter speed first because freezing the action is essential.
If the resulting exposure is too dark, raising ISO may be the next logical adjustment.
This approach prioritizes the most important feature of the photograph: capturing the action clearly.
ISO for Wildlife
Wildlife photography can be unpredictable.
A bird may suddenly fly away, an animal may turn its head, or a subject may move through a shaded area.
You cannot always wait for perfect lighting.
A higher ISO can help maintain the shutter speed required to capture movement.
During bright daylight, you may be able to stay at a lower setting. Near dawn, dusk, or under heavy tree cover, a higher ISO may become necessary.
ISO for Night Photography
Night photography requires a different way of thinking.
If you are photographing a stationary building with the camera on a tripod, you may be able to use a long exposure while keeping ISO relatively low.
If you are photographing people while holding the camera in your hands, the situation changes.
A long exposure may record unwanted movement, so raising ISO can help you use a faster shutter speed.
Tripod Night Photography
A tripod gives you stability.
That means you can often experiment with:
- Longer shutter speeds
- Lower ISO
- Smaller apertures
Handheld Night Photography
Without a tripod, you may need:
- Faster shutter speed
- Wider aperture
- Higher ISO
The right combination depends on the scene.
Auto ISO Explained
Many digital cameras provide an Auto ISO function.
When Auto ISO is enabled, the camera can adjust ISO automatically according to the exposure conditions and the other settings you have selected.
This can be particularly convenient when the photographer is moving between different lighting environments.
For example, you might walk from a bright street into a darker building. Instead of manually changing ISO immediately, Auto ISO can respond to the changing conditions.
Some camera modes also allow Auto ISO while you control another exposure setting.
For beginners, this can be a useful way to learn how ISO changes as the lighting changes.
A Simple Way to Select ISO
You do not need to memorize a huge chart.
Try this process:
1. Check the Available Light
Start by asking whether the scene is bright, shaded, indoors, or dark.
2. Think About Movement
A stationary object gives you more flexibility with shutter speed.
A moving subject usually requires more attention to shutter speed.
3. Decide on Aperture
Choose the aperture based on the depth of field and light you want.
4. Set the Shutter
Choose a shutter speed that suits the subject.
5. Adjust ISO
If the photograph is still too dark, increase ISO.
This approach keeps ISO connected to the actual photographic situation.
A Practical ISO Reference
These numbers can be used as starting points rather than strict rules:
| Situation | Starting Point |
|---|---|
| Strong daylight | ISO 100–200 |
| Mildly cloudy outdoors | ISO 200–400 |
| Bright indoor room | ISO 400–800 |
| Indoor event | ISO 800–1600 |
| Evening scene | ISO 800–3200 |
| Dark venue | ISO 1600+ |
| Fast action in poor light | Higher ISO may be necessary |
Your camera may produce different results, so treat these values as a guide rather than a fixed formula.
Common ISO Mistakes
Using High ISO in Bright Sun
If the scene is extremely bright, leaving ISO unnecessarily high can reduce your flexibility.
Check the setting when moving between locations.
Keeping ISO Low at All Costs
This is another common beginner mistake.
A very low ISO is not helpful if it forces you to use a shutter speed that produces motion blur.
Ignoring the Camera’s Base ISO
Different cameras have different native or base ISO characteristics. Some models have a base value of 64, while others use 100.
Copying Someone Else’s Settings
A photographer using a different camera and lens may need completely different settings.
Use other photographers’ settings as learning examples, not as universal rules.
How to Learn ISO Quickly
The fastest way to understand ISO is to test it yourself.
Find a stationary subject and keep the composition unchanged.
Take several photographs while changing only ISO:
- ISO 100
- ISO 400
- ISO 800
- ISO 1600
- ISO 3200
Then compare the photographs.
Look at the darker areas first.
Check:
- Shadow detail
- Fine textures
- Skin or surface tones
- Grain
- Overall sharpness
Next, repeat the same experiment in a darker environment.
You will begin to see exactly how your particular camera behaves.
ISO and Photography Editing
Post-processing can reduce the appearance of noise, but it cannot always completely restore detail that was never captured clearly.
This is why exposure still matters when shooting the original photograph.
A well-exposed image at a moderately high ISO may be easier to edit than a heavily underexposed photograph that has been brightened dramatically afterward.
For important photographs, try to get the exposure as close as practical while you are shooting.
Should You Always Use the Lowest ISO?
No.
This is one of the most important lessons for beginners.
A lower ISO is often useful for image quality, but photography is not a competition to see who can use the smallest number.
Consider the subject.
If a person is moving, you may need a faster shutter.
If you are photographing a landscape on a tripod, you may have more freedom to keep ISO low.
If you are photographing a bird in flight at dusk, a higher ISO may be completely reasonable.
The best setting depends on what the photograph requires.
Frequently Asked Questions
What is ISO on a camera?
ISO is a numerical exposure control that determines how the camera responds to available light. Lower values are commonly used in brighter conditions, while higher values can help in darker situations.
What ISO should I use during the day?
ISO 100 or 200 is often a sensible starting point in bright daylight, although the correct setting depends on your camera and other exposure choices.
What ISO is good for indoor photography?
There is no universal number, but ISO 400, 800, or 1600 can be useful starting points depending on the amount of light and the shutter speed you need.
Does increasing ISO make a photograph brighter?
Changing ISO can increase the exposure of the resulting image when the other settings remain unchanged. It is one of the controls used to balance exposure.
Why does my photo look grainy at high ISO?
Higher ISO settings can make digital noise more visible. The amount of noise depends on the camera, exposure, lighting, and image processing.
Is Auto ISO useful for beginners?
Yes. Auto ISO can simplify exposure management while you learn how aperture and shutter speed affect your photographs.
Can ISO be too high?
Yes, depending on the camera and the intended result. Extremely high settings can produce significant noise and loss of fine detail.
Final Thoughts
ISO camera settings become much less confusing when you stop treating the ISO number as an isolated setting.
Instead, look at the whole scene.
Ask yourself how much light you have, whether your subject is moving, what shutter speed you need, and what aperture will create the look you want. Then use ISO to help bring those choices together.
A low ISO can be a great option in bright conditions, while a higher ISO can rescue a photograph when the available light is limited. Modern cameras also give photographers much more freedom at high ISO than older digital systems did.
The most useful way to learn is through experimentation. Photograph the same subject at several ISO values, compare the results, and learn where your own camera starts showing noticeable noise.
Once you understand that relationship, ISO stops being just another number in the camera menu and becomes a practical part of your photography workflow.